ZEUSZ Ultra V0.4.0
Online manual
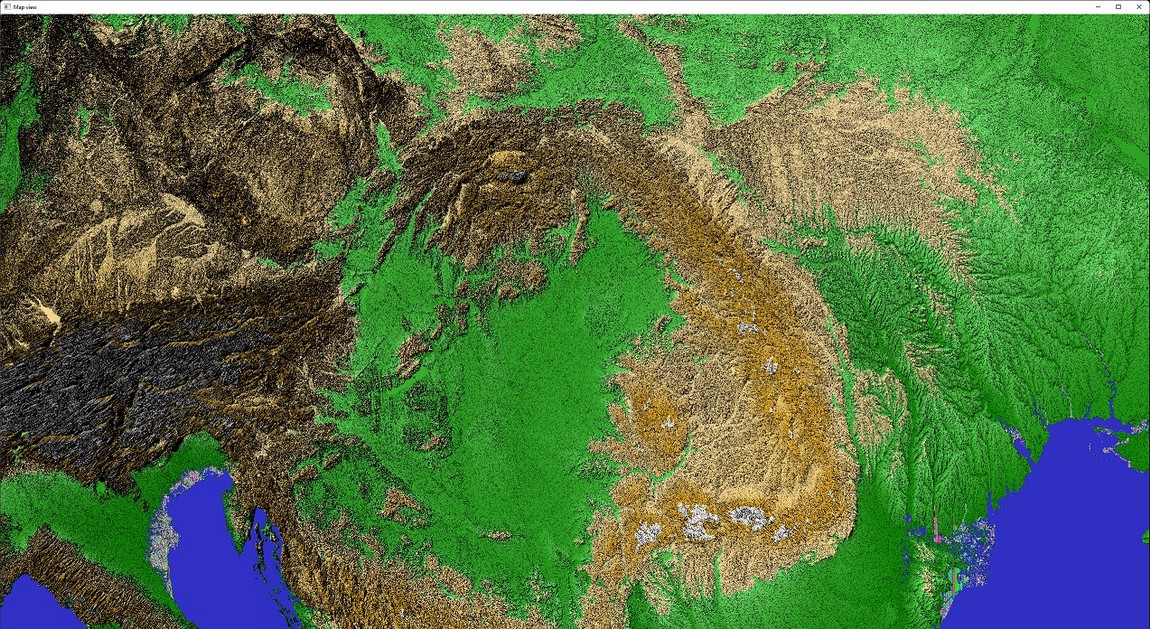
Table of contents
Introduction
What is ZEUSZ Ultra? It is an independent research project with the goal of creating a powerful modern GIS visualisation software with CUDA rendering and open source roots.
System requirements
- Windows 10/11
- CPU with at least 2 cores
- 16 GB RAM minimum
- CUDA capable GPU
- Latest CUDA runtime libraries installed
- Storage: 1MB for the bare application files and 3GB (for all sample GIS data)
- NVIDIA GPU with CUDA support, with at least 2GB video memory (4 GB or 8GB recommended)
- Gamepad to view/rotate maps (no mouse input at the moment!).
Installation
The core application files can be downloaded from the github: https://github.com/zeuszultra/zeusz_ultra
All other files can be downloaded from here. (This is needed, because github cannot store larger than 25MB files.)
The installation is quite straight-forward, just unzip the downloaded files after download to a custom directory of your choice.
It is important however, that all directories are available, een if they are empty at the beginning.
The current directory structure is:
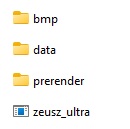
BMP: stores the application icons.
DATA: special format GIS data files.
PRERENDER: if you activate the appliction's pre-rendering engine, the pre-rendered image files will be stored here.
Normally, you don't have to manipulate these directories directly.
The github repository contains 1 map data file at the moment:
RAILWAYS.TER: Hungarian railways vector data (OpenStreetMap derivative).
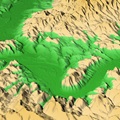
The optional downloadable data files contain height map for the Hungary region and terrain elevation data for the Budapest region (these data are custom derivatives of the publicly available NASA SRTM elevation data):
TERRAIN_HEIGHT_MAP.TER
TERRAIN_HUNGARY.TER
Further optional data files:
ROADS.TER: Hungarian roads vector data (OpenStreetMap derivative).
The application can be started by simply double-clicking on ZEUSZ_ULTRA.EXE.
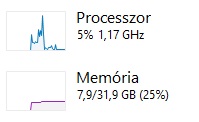
Please note, that the initial memory allocation can consume some time (even 10-20 seconds), befor the GUI is launched. So, please be patient!
If you like, you can overwatch the startup process with windows' internal Task manager.
Hint: some anti-virus software may prompt, that somw features of the application are blocked or so. This is normal, as this application uses lots of low-level Windows API functions, which can cause such warnings. You can ignore them. The application itself will (should) work fine despite of that.
GUI overview
The main window is the "control center" of the application. Every function and the related window can be reached with icons. The related windows can be shown and hidden by these icons.
Note: All application windows can be shown and hidden as many times as you want, except the main window. If yu close it, the application will be shut down completely.
 The map view icon: the visual rendering output of the application.
 General Settings: fine tuning options for the application behaviour.
 The external devices icon: you van select and start receiving location data from external devices (like USB GPS receivers), which support Sensor API.
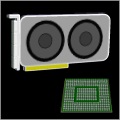 The GPU settings icon: gives you access to an exceptional detailed GPU configuration tool for the renderings.
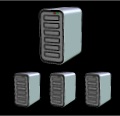 Networking options: client and server modes available.
All other icons represent functionalities, which are not implenmented yet.
The Map window
The real output of the application is a rendered image of the map. This window has a dimension of 1900x1000 pixels. The window can be resized as needed, then the window content will be resized as well, but always based on the default resolution 1900x1000.
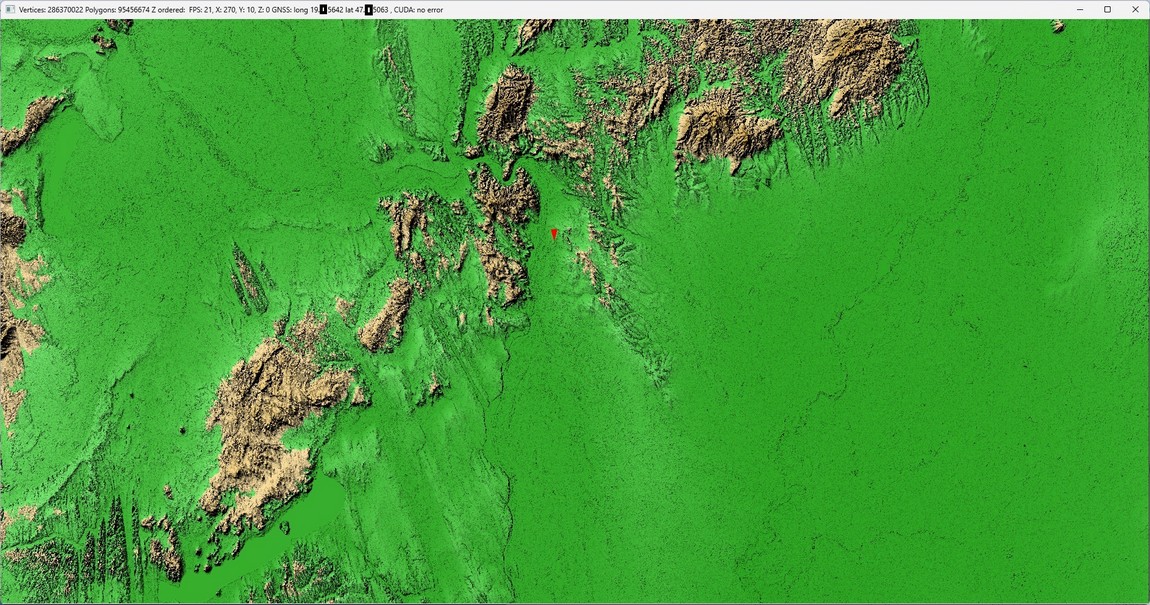
The window's title contains some technical data.
The data are as follows:
- The number of vertices and polygons the current rendered 3D model consists of.
- Z ordered: not used.
- An estimated FPS value.
- The X, Y and Z rotation angles of the model.
- The longitude and latitude sensor data, if one has been activated.
- CUDA kernel executon results (used only for debugging).
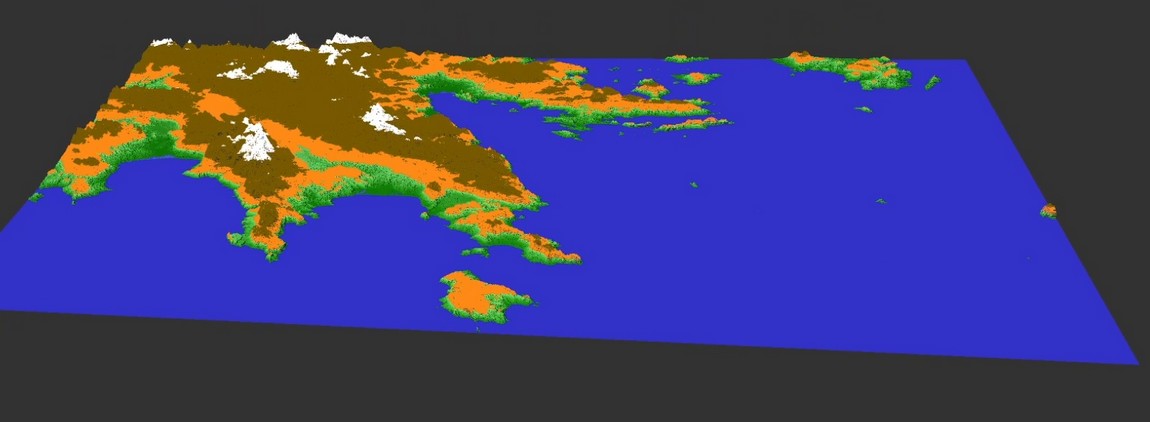
Note: The current version of ZEUSZ ultra supports wireframe rendering for all map layer types. This will be extended in upcoming versions to point cloud and filled triangle as well.
Interactivity
Mouse
Right click+move rotates the map.
Left click+move pans the map.
The mose wheel zooms in and out.
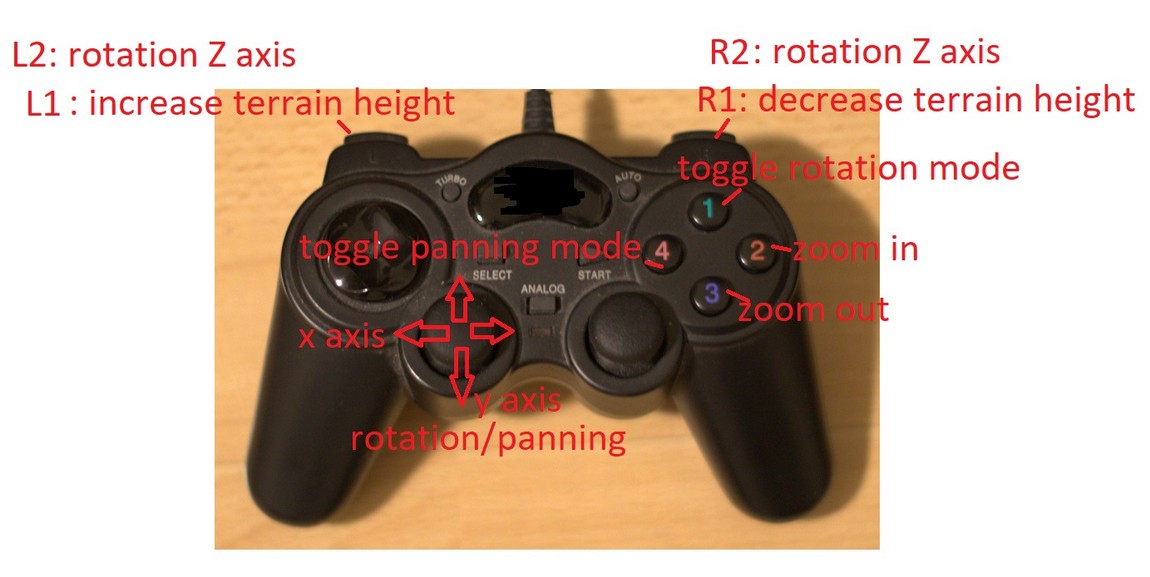
Gamepad
At the moment the content of the map window can only be viewed with a gamepad.
You can rotat, pan, zoom the entire 3D content. Even real-time manipulations as terrain height changes are possible.
General Settings window
With the new setting options, you can control the default map positioning and appearance as well as the RAM usage for terrain data processing.
Please note, that at the moment, not every option is available.
Map cache size is currently fixed in the application, no change possible.
The size of the map rendering window will also be changeable from here.
Application logging will be accessible from here as well.
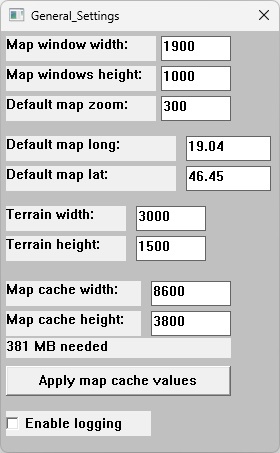
Further details will be added here soon.
GNSS sensor setup window
ZEUSZ Ultra supports the usage of external location sensors. All available devices are scanned for at startup. If you attach a new device to your PC and want to use it, you have to restart the application.
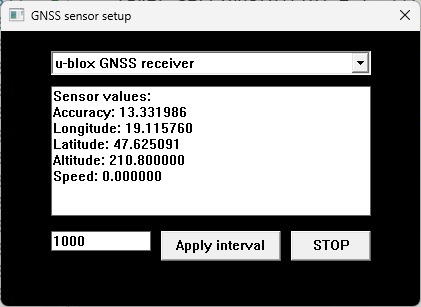
Location data can be read from the sensor continuosly, at regular intervals, which can be defined in milliseconds. This can be activated with the 'Apply interval' button.
The query can be stopped here as well, by clicking on the 'STOP' button.
The loaction data will also be displayed on the rendered map, as a red triangle.
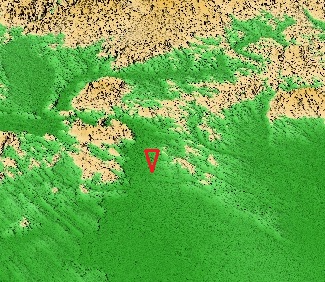
Please note, that the visualisation of the current position is not that exact at the moment.
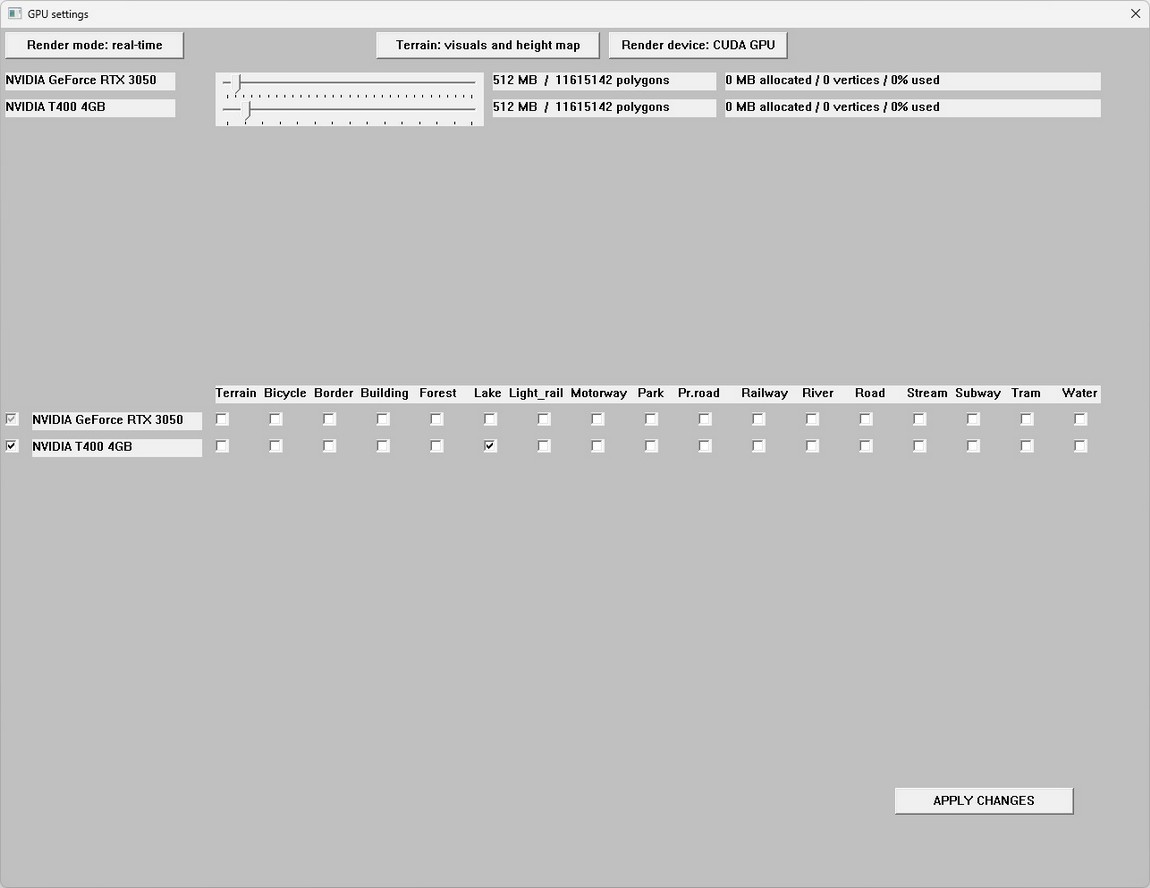
The GPU configuration window
ZEUSZ ultra provides premium fine-tuning options for gpu rendering.
Note: ZEUSZ ultra's current version doesn't provide software rendering output, so you have to use it with an NVIDIA GPU. CPU rendering will be available in future releases.
Please keep in mind, that every change you make here will only take effect, if you click on the 'APPLY CHANGES' button in the bottom right corner. This indicates, that every map data etc. is loaded from scratch again.
A total of 10 GPUs are supported for rendering in the current application version. Each map layer can be rendered on separated GPUs.
Render modes:
The two fundamental rendering approaches are on-the-fly or real-time rendering and pre-rendering. Both techniques support single and multi-GPU configurations as well.
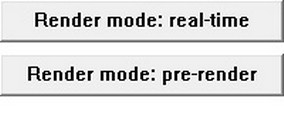
With real-time rendering, every frame is calculated on the GPU(s), as you control the gamepad.
Pre-rendering however renders every frame for a 360 degree Y axis rotation in advance. Pre-rendering is useful for low-end PCs or extremely large data sets, with which real-time rendering would not be possible anyway. The rendering is done in 5 degree rotation intervals. The pre-rendering progress is automatically done, when you rotate the map view. The progress (currently rendered frame of y axis degree) is displayed in the window's title bar. After that, every rotation along the y axis uses pre-rendered frames, nothing will be calculated on the GPU. If you rotate the view along the x axis or make a zoom, the pre-rendering is started again. In practice, pre-rendering is done in 1-2 seconds in most cases, so it is pretty fast.
Pre-render targets:
When the render mode is set to 'pre-render', you can define how the pre-rendering is done.
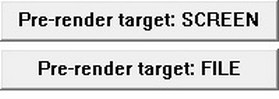
SCREEN: pre-rendering is done within the RAM.
FILE: this option saves every pre-rendered frame as a file. When the pre-rendering is done, all frames will be read from disk. The files are stored in the directory PRERENDER. It is recommended to use an SSD drive for this.
Terrain data handling:
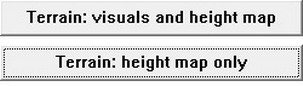
Optionally, you can download terrain data for the Budapest region and a height map for Hungary. You can define, if you want to visualize the terrain data as well or just want to use the height map. All map layers are thenlayd out using this height map.
GPU memory allocations
All available CUDA enabled GPUs will be listed here. The application ueses by default the main system GPU for all map layer renders.
The default allocatio is 1600MB, but you can override this in 256MB steps. Also 256MB will be left for the operating system and not made availble for the application in order to avoid interference with the operating system, which uses also some VRAM. According to do settings here, the available and currently loaded count of polygons and is displayed as well.

MAP layers and GPUs
In theory, all needed map layers can be associated to a different GPU. In practice, the usage of more GPUs for real-time rendering is only recommended with 2-3 GPUs, because moving the data through the PCIE lanes etc. takes some time and the GPUs will wait for each other to finish rendering. Using more than 3 GPUs makes sense for extremely large data sets, where the focus is on the rendering result based on lots of GBs of data and not the real-time manipulation of the data.

Extreme rendering
This research-level rendeing technique is not yet acivated, in the current application release. This technique works similar to the pre-render technique, but with the differenc, that only the rendering of 1 single frame is in focus. With extreme rendering, virtually unlimited data can be rendered i a way, that the data is loaded in sequences. After each loading sequence, data is rendered on the GPU, then the next data part is loaded and rendered etc., until all data are processed. With this technique, even low-end PCs can process hundreds of GBs of data and lots of money can be saved.
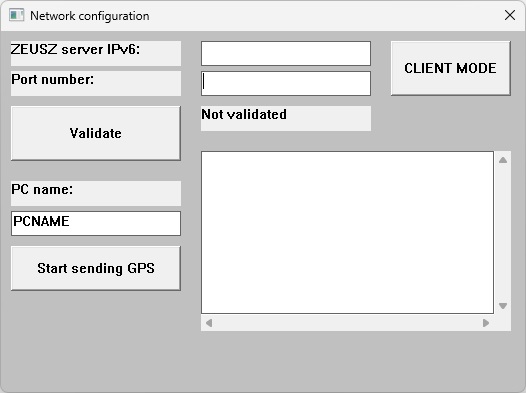
The Network configuration window
Client mode with GPS data sharing and server mode for receiving data are supported.
>>This section will be described later in more detail..<<
HERMES data processing tool set
Preparation
The HERMES tool set is a powerful command-line set of console applications, which can process vector based map data in CSV format and convert them into the binary TER format, which is used by ZEUSZ. Up to 2-3 million rows/second processing speedcan be achieved, so you can get a set of map data in just a few minutes.
Before anything can be done, map data must be exported into CSV format. I use for this QGIS with OSM data extracts provided by Geofabrik and the MMQGIS plugin.
This plugin exports point data and vector data into CSV format.
For vector data the files temp-attributes.csv and temp-nodes.csv are generated. Point-based data is exported onlí into temp-nodes.csv.
Some examples for data extracts below.
TEMP-ATTRIBUTES.CSV:
"shapeid","osm_id","code","fclass","population","name"
"0","8665423","1020","island","0","Angyali-sziget"
TEMP-NODES.CSV:
"shapeid","partid","x","y"
"0","0","18.949377","47.1791434"
The data have to be exported in the followinf directory structure (_a in the names distinguishes vector data from point data, if needed):
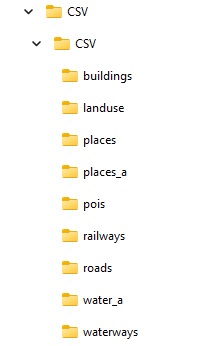
Not every vector layer has to be exported, everything is optional.
Generating scripts
The HERMES tool set is driven by simple BATCH files, which are generated with the hermes_script_gen_v2.exe tool.
Also the TXT file CSV_FOLDERS.TXT must be existent in the same folder. This is just a legacy thing and will be removed later. The script generator just relies on the availability of this file, that's all.
To generate the batch files, simply execute START.BAT, which prepares destination folders (for example the TER folder, which will contain the ready-to-use TER binaries) and triggers the script generation:
del CSV\CSV\*.csv
echo CSV_file,MAX_ROW_WIDTH,TOTAL_NODES,LARGEST_SHAPE > CSV\CSV\CSV_report.csv
rd /q /s TER
REM dir /ad /b > csv_folders.txt
md TER
md TER\hires
md TER\lowres
md TER\labels
md TER\poi
hermes_script_gen_v2 CSV\
TER data generation
If you execute START.BAT, lots of BATCH files are generated (58, to be exact).
Don't be afraid, you only have to execute one of them, the __SUPER_CREATIOR.BAT file.
During the execution, informations are displayed about the current progress of the data generation.
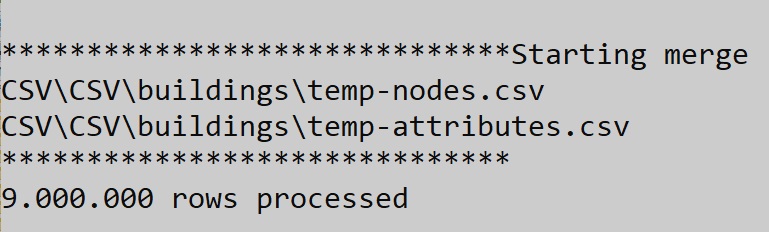
The most important steps of the process are:
- merging CSV files with vector data (so TEMP-NODES and TEMP-ATTRIBUTES are matched and merged into a single CSV file)
- filtering of the merged CSV data files (roads are for example filtered into motorway, roads types etc.) into smaller CSV files.
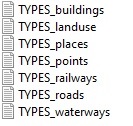
- There are also some files containing data analyzis of the merged CSV files. These are only experimental for the moment and can be generated by manually launching the _SUPER_GETTYPES.BAT file.
- TER data generated from merged and filtered CSV files into the TER folder.
The TER folder has the following directory structure:
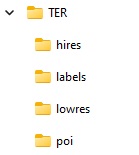
Inside these folders, every data has the extension .TER.
ZEUSZ can process these data right away. Please note however, that ZEUSZ can handle only one TER data set at the same time.
Note: merged and filtered CSV data files are stored in the CSV folder structure and are only needed temporarely. The __SUPER_CREATIOR.BAT file removes every unnecessary files before launching the data processing.
Downloads
Basic package on Github: Download
Updated map data files! It is recommended to download and use the current map data file set!
Map data (ZIP):
The following data are only compatible beginning from the version V0.6.0: